> ## Documentation Index
> Fetch the complete documentation index at: https://docs.hypeframe.ai/llms.txt
> Use this file to discover all available pages before exploring further.
# Start a new project
> Create your first application with HypeFrame. Describe what you want to build and watch it come to life.
## Create your first application
Starting a project is as easy as describing what you want to build. HypeFrame takes your description and turns it into a working application.
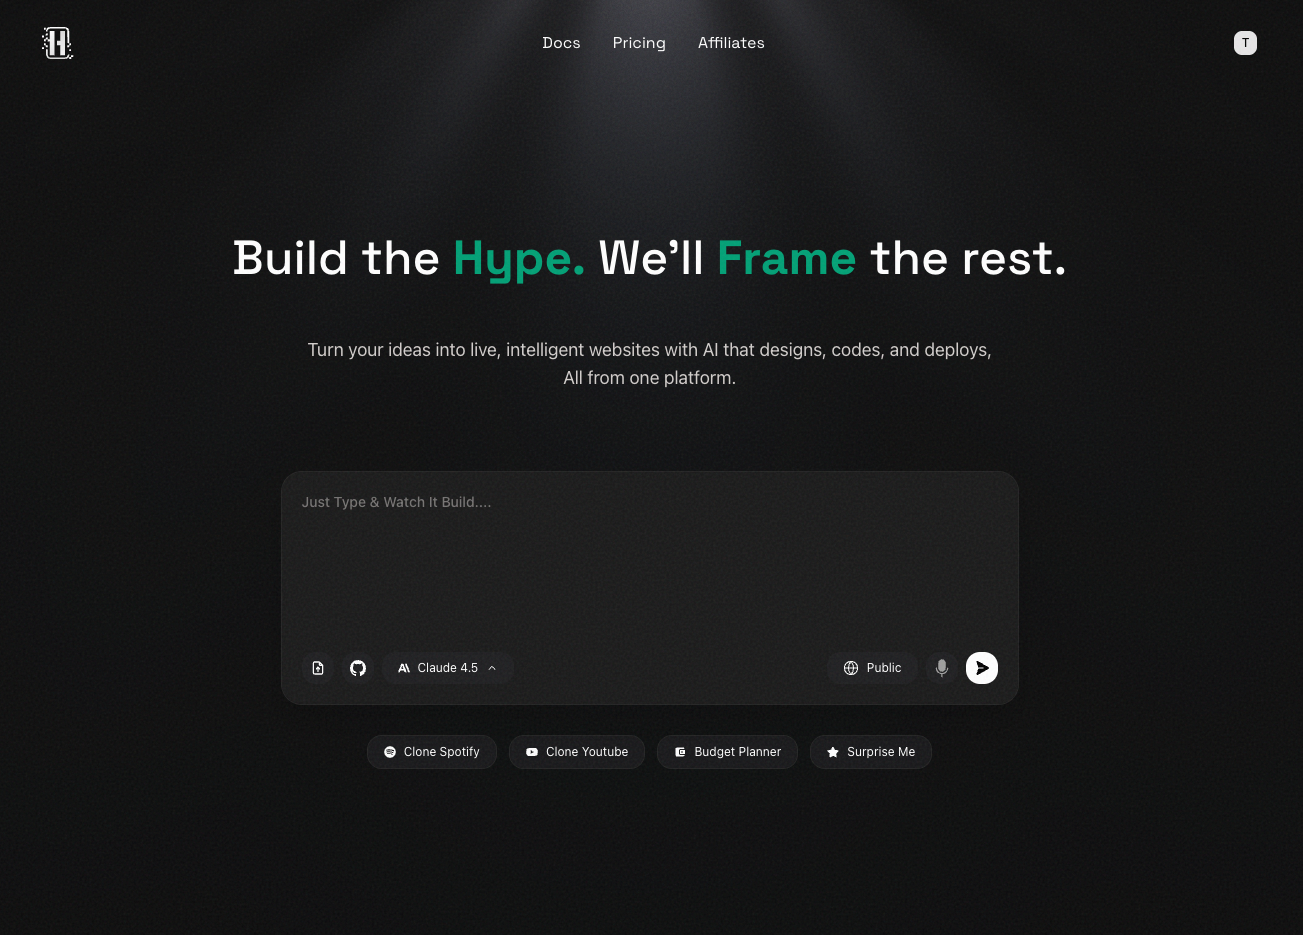
After signing in, you'll land on this screen below. From here, you can create new projects.
 If you cant't build after writing your prompt then, make sure you're logged in.
This is where the magic happens. In the prompt box, tell HypeFrame what you
want to build. Be as specific as you can about: - What your application does -
Key features you want included - Who it's for or what problem it solves For
example, you might say: "Create a task management app where users can organize
projects, add team members, and track progress with visual boards."
Don't worry about being too technical. Describe it in plain language, just
like you would explain it to a friend.
You can select a few stuff to set things up: - **Model type**: Claude,
Anthropic, Moonshot or something else? - **Visibility**: Choose between public
or private projects. You can switch between private and public at any time,
and both options are available in both free and paid plans. These settings
help HypeFrame build exactly what you need.
Once you click "Create Project," HypeFrame starts building your application. You'll see progress as each part comes together. This usually takes just a few minutes.
Your application is being created! Grab a coffee—it'll be ready soon.
## Other ways to start
You're not limited to just describing your idea. HypeFrame offers a few different ways to get started:
Have a Figma design ready? Import it directly and HypeFrame will turn it into code.
Upload mockups or wireframes to guide the build process.
Browse our template library to kickstart your project with a proven structure.
Already have code? Import it and let HypeFrame enhance or extend it.
## Tips for better results
Want to get the best results from HypeFrame? Here are some things that help:
* **Be specific**: The more details you provide, the better HypeFrame understands what you want
* **Think about users**: Describe who will use your app and what they need to do
* **Mention key features**: List the most important things your app should do
* **Start simple**: You can always add more features later through conversation
If something doesn't turn out quite right, don't worry. You can always ask
HypeFrame to make changes or adjustments after the initial build.
## What happens next?
Once your project is created, you can:
* **Review the code**: See exactly what HypeFrame built for you
* **Make changes**: Ask for adjustments using natural language
* **Preview it**: Test your application before deploying
* **Deploy it**: Publish your app with one click when you're ready
Learn how to make changes and improvements to your application.
Publish your application and make it live on the web.
## Need help?
Stuck on describing your project? Not sure what to include? Reach out at
[contact@hypeframe.ai](mailto:contact@hypeframe.ai) or check out our community
for examples and inspiration.
If you cant't build after writing your prompt then, make sure you're logged in.
This is where the magic happens. In the prompt box, tell HypeFrame what you
want to build. Be as specific as you can about: - What your application does -
Key features you want included - Who it's for or what problem it solves For
example, you might say: "Create a task management app where users can organize
projects, add team members, and track progress with visual boards."
Don't worry about being too technical. Describe it in plain language, just
like you would explain it to a friend.
You can select a few stuff to set things up: - **Model type**: Claude,
Anthropic, Moonshot or something else? - **Visibility**: Choose between public
or private projects. You can switch between private and public at any time,
and both options are available in both free and paid plans. These settings
help HypeFrame build exactly what you need.
Once you click "Create Project," HypeFrame starts building your application. You'll see progress as each part comes together. This usually takes just a few minutes.
Your application is being created! Grab a coffee—it'll be ready soon.
## Other ways to start
You're not limited to just describing your idea. HypeFrame offers a few different ways to get started:
Have a Figma design ready? Import it directly and HypeFrame will turn it into code.
Upload mockups or wireframes to guide the build process.
Browse our template library to kickstart your project with a proven structure.
Already have code? Import it and let HypeFrame enhance or extend it.
## Tips for better results
Want to get the best results from HypeFrame? Here are some things that help:
* **Be specific**: The more details you provide, the better HypeFrame understands what you want
* **Think about users**: Describe who will use your app and what they need to do
* **Mention key features**: List the most important things your app should do
* **Start simple**: You can always add more features later through conversation
If something doesn't turn out quite right, don't worry. You can always ask
HypeFrame to make changes or adjustments after the initial build.
## What happens next?
Once your project is created, you can:
* **Review the code**: See exactly what HypeFrame built for you
* **Make changes**: Ask for adjustments using natural language
* **Preview it**: Test your application before deploying
* **Deploy it**: Publish your app with one click when you're ready
Learn how to make changes and improvements to your application.
Publish your application and make it live on the web.
## Need help?
Stuck on describing your project? Not sure what to include? Reach out at
[contact@hypeframe.ai](mailto:contact@hypeframe.ai) or check out our community
for examples and inspiration.